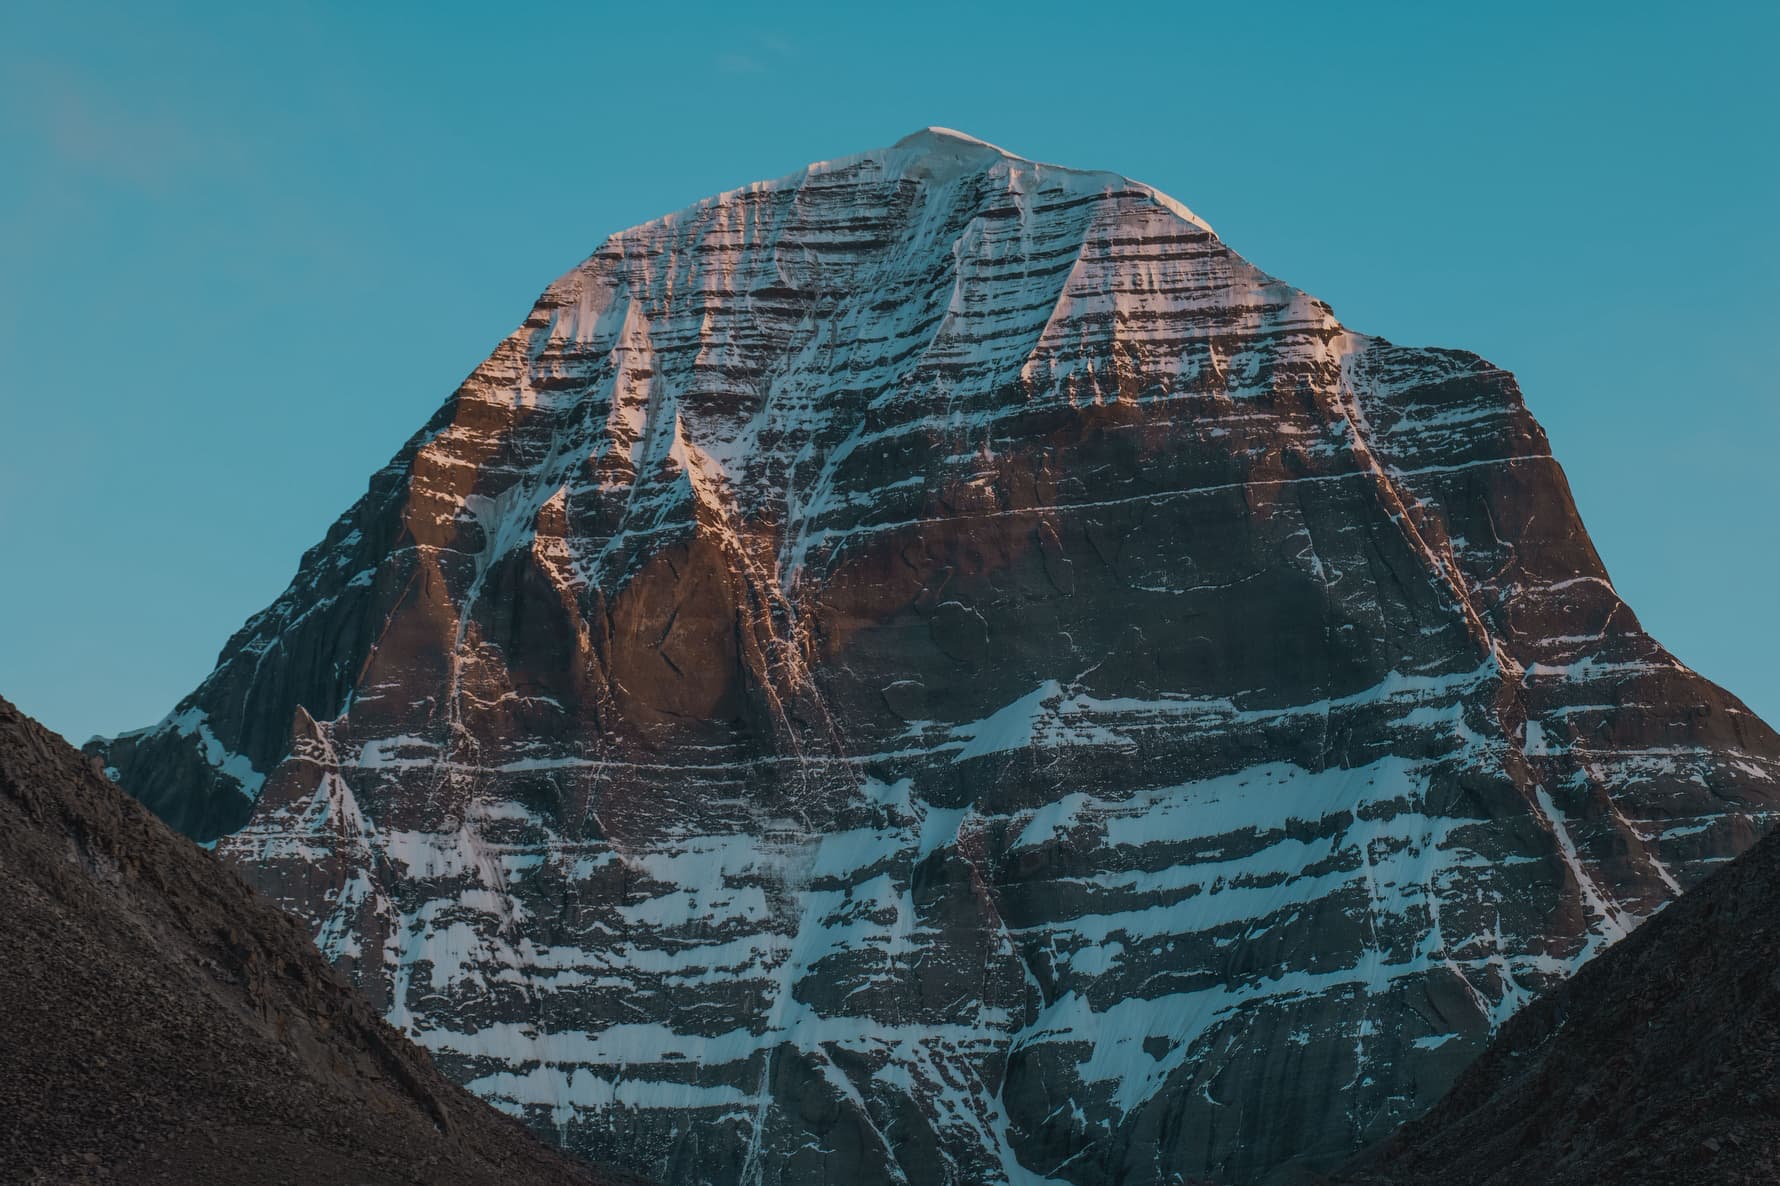
How to Prepare for a Pilgrimage to Kailash

How to Prepare for a Pilgrimage to Kailash:
A Complete Guide from Practitioners (2026)

How to Prepare for a Pilgrimage to Kailash:
A Complete Guide from Practitioners (2026)
Kailash is not about beautiful photos on Instagram. It is 52 km of trekking at an altitude of 4600–5630 meters, where every breath requires effort, and the Drolma-La Pass at 5630 m filters out those who prepared "by video." Over eight seasons, I have seen athletes who turned back at 4800 m and vegetarian yogis who completed the trek in one day. The difference is not in gym experience — it lies in systematic preparation that starts 4–6 months in advance.
Kailash requires synchronization of four components: physical endurance, documentation (Chinese bureaucracy is a separate quest), acclimatization schedule, and gear for extreme conditions. A mistake in any block can ruin the entire trip: I once led a group where a participant's visa arrived a day after the flight — we had to change flights, lose money, and disrupt acclimatization. Below is a step-by-step checklist that we provide in the sacred trek program from Lhasa, supplemented with real cases of failures.
Why Specific Preparation is Necessary (and Why Experience from Elbrus Won't Work)
-
Altitude + Duration = Unique Load. On Elbrus, you sleep at 3800–4200 m, the ascent takes 6–8 hours, then you descend. On Kailash, you live at 4500–4700 meters for a week, trekking 10–12 hours a day for three consecutive days. The body operates in a state of chronic oxygen debt: resting heart rate increases by 25–30% compared to sea level, sleep is shallow, and appetite is nonexistent. The main risk is not acute mountain sickness (which is monitored with a pulse oximeter), but cumulative fatigue, which on the third day turns the last 8 km into torture.
-
What Kills Newcomers:
-
Cardiovascular Ceiling. The heart fails to adapt to the load. The first 500 meters of ascent — heart rate hits 150, recovery takes 10 minutes. Result: the group moves ahead, you stay behind with the guide, it gets dark, and the temperature drops to -10°C.
-
Dehydration. At 5000 meters, the body loses 3–4 liters of moisture per day through breathing. If you don’t drink water (it’s cold, and you’re too lazy to melt snow) — in a day you’ll have a headache, nausea, and confusion.
-
Underestimating the Cold. August at Kailash: daytime +15°C, nighttime -5…-15°C. The wind at the pass can knock you down. A cheap sleeping bag (comfort +5°C) + a tent without a skirt = a sleepless night, and in the morning you have no strength to walk.
Physical Preparation: 16-Week Protocol
-
Basic Fitness is Insufficient. You need aerobic endurance + leg strength + the habit of long monotonous loads.
-
Checklist at the Start (4 months before departure):
-
Base Test: Walk 15 km with an 8 kg backpack in 3.5 hours without stops, heart rate no higher than 140. If you can’t do it — start with 10 km, increasing by 2 km each week.
-
Three Training Blocks per Week:
- Long Walk: Saturday/Sunday, 3–6 hours, backpack 10–12 kg, heart rate 120–135 (zone 2). By the 12th week — 25 km in 5.5 hours.
-
Intervals on Terrain: Wednesday, climb stairs/slopes for 30 minutes, 10 sets (2 minutes fast, 2 minutes slow), heart rate up to 160.
-
Leg Strength Training: Monday, squats with weights, lunges, step-ups on a 50 cm platform, 3×15 reps.
- Last 4 Weeks — Simulating Altitude: If you have access to a hypoxic generator — 60-minute sessions at 14% O₂ (equivalent to 3500 m). If not — increase the distance to 30 km, backpack 15 kg.
-
Red Line: Two weeks before departure — tapering, reducing volume by 40%, maintaining intensity. The body needs to recover; otherwise, you’ll arrive tired and won’t acclimatize.
-
Case from Practice: A 45-year-old participant, running 3 times a week for 10 km, thought he was ready. At an altitude of 4700 m, he couldn’t walk 100 meters without stopping — heart rate 170, short of breath. Reason: running endurance ≠ trekking endurance. Running is a cycle of 1.5–2 hours, the trek is 10 hours of slow walking. Different energy systems.
Documents and Visas: 90 Days for Processing
-
Chinese Visa + Tibet Permit — A Two-Tier System. A tourist visa for China (30 days, $60) is processed through the consulate in 10–14 days, but for Kailash, you need a Tibet Travel Permit (permit), which is issued only by accredited Tibetan agencies based on your passport + visa copies + tour program. The permit takes 25–30 days to process, plus there’s a risk of denial without explanation.
-
Schedule (countdown from the departure date):
-
D-90: Book the tour, send a passport scan to the organizer.
-
D-60: The agency submits a request for the permit, you submit documents for the visa at the consulate (if not in Moscow — through a visa center, +3 days).
-
D-30: The permit is ready (PDF via email, the original is met by the guide in Lhasa/Kathmandu), the visa is glued in the passport. Buy flight tickets (earlier — you risk your money if the permit is denied).
-
D-7: Final briefing, check: the permit is printed in 2 copies, insurance for $50,000 with helicopter evacuation coverage (Tibet is not Europe, evacuation costs $20,000).
Blacklist of Reasons for Permit Denial:
-
Journalists, human rights activists, public criticism of China on social media (they check Facebook/Instagram by name).
-
Date discrepancies: the permit is valid strictly for the specified dates; if you change your flight — a new one is needed.
-
Group permit: if even one participant is denied, the others cannot go (individual permits are 30% more expensive).
Alternative via Nepal: Route with Gosainkunda — Nepalese visa on arrival ($50), Chinese permit processed in Kathmandu in 7 days, less bureaucracy, but +3 days for acclimatization in the Kyirong Valley.
Gear: What to Bring and What Will Kill You
-
Principle: Every Gram Counts, but Cold/Altitude Don’t Forgive Savings.
-
Must-Have Checklist (tested at -20°C and 15 m/s wind):
-
Sleeping Bag: comfort -10°C (not limit!), down, weight up to 1.5 kg. Synthetic is cheaper but heavier and less warm. Brands — no advertising, just look for filling power of 650 or more.
-
Trekking Poles: two, mandatory. They reduce 20% of the load on the knees during descents. At Drolma-La Pass, you walk on snow/ice — without poles, you’ll slip.
-
Footwear: trekking boots with a membrane, broken in, ankle support. Sneakers — instant blisters + cold feet.
-
Clothing (layers): synthetic thermal underwear (not cotton!), fleece 200 g/m², down jacket (150–200 g of down), membrane jacket/pants. At the pass, wear everything at once.
-
Little Lifesavers: sunscreen SPF 50+ (UV at 5000 m is 50% harsher), lip balm, pulse oximeter ($10, monitor O₂ saturation, norm at altitude 75–85%), headlamp (you leave at 5 AM, it’s dark).
-
What to Leave at Home: camera larger than a mirrorless (smartphone takes enough), books (not read at altitude), jeans, cotton t-shirts (get wet from sweat, don’t dry, cold).
-
Killer Mistake: cheap backpack without a hip belt. All the weight on the shoulders — after 2 hours of walking, your trapezius muscles ache, and on the third day, you can’t lift your arms. A 60–70 L backpack with a hip belt transfers 70% of the weight to the pelvis.
Budget and Risks — in the next section. The main thing now: preparing for Kailash is a 4-month project where every detail is critical. Start with physical training and documents simultaneously, gradually purchase gear, and test it on weekend hikes. Improvisation at an altitude of 5600 meters costs health.
Physical Preparation: 3–6 Months Before Departure

Physical Preparation: 3–6 Months Before Departure
Basic Endurance Checklist
-
What DOES NOT Work: gym focused on mass, yoga twice a week, confidence that "I walk 10,000 steps a day." The trek around Kailash is 53 km over 12–15 hours of pure movement at an altitude of 4600–5600 m, where every breath contains 40% of the oxygen at sea level. Your biceps won’t help when your heart races at 140 beats per minute while climbing Drolma-La.
-
What is Essential (start at least 3 months in advance, 6 months is ideal):
-
Cardio 4–5 times a week, at least 60 minutes continuously. Running, cycling, rowing machine, elliptical — it doesn’t matter, the main thing is to keep your heart rate in the 130–150 beats zone. If after a month your heart rate doesn’t drop — you’re going too fast, slow down. Goal: teach your heart to pump blood efficiently during prolonged exertion.
-
Walking with a 10–15 kg backpack on uneven terrain, 2 times a week. Not asphalt — woods, hills, stairs in the park. Start with 5 km, by the end of training — 15 km in 3–4 hours. Load the backpack with water bottles (easy to adjust weight), wear the one you’ll use for the trek — check the straps, avoid blisters at home, not at altitude.
-
Readiness Test: climb to the 15th floor without stopping. If you start to feel short of breath on the 8th–10th floor — another 2 months of training. If you reach the top comfortably, speaking in sentences without breathlessness — you have a base.
Progress Table (flexible, according to your level):
| Month | Cardio (min/week) | Backpack (kg) | Distance with Backpack (km) | Checkpoint |
|---|---|---|---|---|
| 1 (base) | 180 (3×60) | 5 | 5 | Heart rate recovers in 3 min |
| 2–4 (volume) | 300 (5×60) | 10 | 10 | 15 km with backpack without knee pain |
| 5–6 (peak) | 360 (6×60 or intervals) | 15 | 15 | 20 km with an elevation gain of 600 m in 4 hours |
Mistake No. 1: starting a month before departure. Ligaments, heart, and lungs won’t adapt — you’ll experience overload or altitude sickness on the trek. A minimum of 12 weeks of preparation is required; otherwise, the program from Lhasa will turn into a survival test.
Breathing Training and Working with Hypoxia
Altitude doesn't kill your legs, but rather the lack of oxygen. At the Drolma-La Pass (5630 m), your body operates in a state of chronic stress — blood thickens, the brain slows down, and even a slight cold can turn into pulmonary edema. Breathing practices over 2–3 months can increase resistance to hypoxia by 15–20%, which makes the difference between "I can go on my own" and "carried on a yak."
Practices (start with 10 minutes daily, increase to 20–30):
-
Wim Hof Method: 30 deep breaths in and out, hold your breath after exhalation for 1.5–2 minutes, followed by a restorative breath. 3–4 cycles in the morning on an empty stomach. It trains tolerance to CO₂ and teaches the body to function under stress. The free Wim Hof Method app provides a timer.
-
Pranayama (ujjayi, kapalabhati): Ujjayi — slow breathing through the nose with a narrowing of the vocal cords (ocean sound), 5–10 minutes before sleep, calms the nervous system. Kapalabhati — quick exhalations using the abdomen, 108 cycles, saturates the blood with oxygen, but is contraindicated for hypertension. Yoga YouTube channels provide detailed techniques.
Advanced Level:
-
Hypoxic masks / hyperbaric chambers: If there are sports centers with hyperbaric chambers in your city (Moscow, St. Petersburg — about 1500 rubles/session), 8–10 sessions of 40 minutes at an "altitude" of 3500–4500 m provide an effect comparable to a week in the mountains. Training masks (like the Elevation Training Mask) are a controversial tool; they limit the volume of inhalation but do not reduce the percentage of O₂, so the effect is weaker.
-
Pulse oximeter: Buy one for $10–15 (pharmacies, AliExpress) and train with it. The norm at sea level is 95–100% SpO2, which drops to 75–85% at an altitude of 5000 m. If during a breath-hold your SpO2 does not drop below 90% for 1.5 minutes — your hypoxic resistance is good.
-
Red Zone (contraindications): Chronic lung diseases (COPD, moderate bronchial asthma), hypertension above 140/90 without control, heart failure. Consultation with a therapist and cardiologist with an exercise ECG is mandatory. Do not hide diagnoses from the guide — at altitude, we have no resuscitation, only oxygen and descent. On the route through Nepal, acclimatization is gentler (+3 days in the Kyirong Valley), but the risks are the same.
-
Life Hack: A week before your flight, ascend to the highest accessible altitude (Elbrus, Cheget, even 2500 m is sufficient) and spend 2–3 nights there. Your body will start producing red blood cells, making adaptation on Kailash easier. If there is no altitude available — intensive interval training for the last 2 weeks (30 sec sprints / 90 sec rest, 10 repetitions) — stress for the heart, close to hypoxia.
Documents and Visas: Tibet, China, Nepal — What You Need to Know

Documents and Visas: Tibet, China, Nepal — What You Need to Know
Kailash is located in the Tibet Autonomous Region of China, one of the most closed territories on the planet. Without a package of permits, you won't be allowed beyond Lhasa, and obtaining them independently is physically impossible — only through an accredited Chinese operator. We break down the documents step by step, with real timelines and pitfalls that sink half of the newcomers.
Permits for Tibet (Tibet Travel Permit, Alien's Travel Permit, Military Permit)
Key Fact: Tibet is not just a closed zone, but a multilayered control system. You need three permits:
-
Tibet Travel Permit (TTP) — the basic permit for entering Tibet. Issued by the Tibet Tourism Bureau (TTB) based on an application from a Chinese travel agency. Without it, you will be removed from the Chengdu–Lhasa flight or turned back at the Nepal border.
-
Alien's Travel Permit (ATP) — permission to travel through closed prefectures (Ngari, where Kailash is located). Issued by the local PSB (Public Security Bureau) in Lhasa, requires a copy of the TTP and an itinerary.
-
Military Permit — access to border military zones (the areas around Kailash border with India). The most unpredictable: it can be issued in a day or take a week without explanation.
- Timelines: From submitting a copy of your passport to receiving all permits —
- 25–30 days in the off-season, 35–45 days at peak (May–June, September). Chinese bureaucracy does not work on weekends, and public holidays in China (New Year, National Day) add +7–10 days of dead time.
Documents for processing:
-
Color copy of your passport (valid for at least 6 months after return)
-
Chinese visa (tourist L-visa, group or individual)
-
Photo 3×4 cm
-
Completed form with itinerary, dates, group composition
Pitfalls:
-
Journalists, diplomats, human rights activists — default refusal, even if the profession is stated vaguely. In the application, use neutral wording (instead of "journalist" — "manager").
-
Solo travelers — formally prohibited, but operators gather "paper groups" of 4–5 people with different itineraries. In practice, you go separately, but in the documents, you are a single group.
-
Changing dates: If deadlines are missed, reissuing permits takes another +10–14 days and an additional fee of $150–200. Insurance does not cover this.
On our program through Lhasa, we handle all permits turnkey — you send a scan of your passport 60 days before departure, and you receive the complete package by email 2 weeks before the start. We have been working with a trusted Tibetan partner for 8 years, with a refusal rate of less than 2% (only for medical contraindications).
Chinese Visa: Travel Agency vs. Self-Application
-
Group Visa (through an operator): - Processed by a Chinese partner, you receive a visa sticker in your passport at the Russian consulate 3–5 days before departure -
-
Plus: no need for hotel bookings, tickets, or work certificates — just your passport and photo -
-
Minus: strict adherence to group dates, extension/change is impossible -
-
Cost: $60–80 (included in the tour price)
-
Individual Tourist L-Visa: - Apply independently through visa centers (Moscow, St. Petersburg, Yekaterinburg, Vladivostok) or by proxy in the regions - Requirements: hotel bookings for the entire duration, return tickets, bank statement (minimum $2000), work certificate -
-
Timelines: 7–14 working days (express service in 4 days — additional fee of 100%)
-
Cost: about $125 + service fee of the visa center (~$25)
Life Hack: If you plan to go to Tibet, apply for the visa through an operator — 2–3 months before the trip, not at the last minute. Chinese consulates occasionally have "dark weeks" (technical pauses, internal checks) — visas are not issued at all, with no warnings. In March 2023, there was an 11-day pause, causing several groups to be canceled.
Route Through Nepal — Alternative Scenario
If the Chinese visa process scares you or time is tight, there is a route Kailash through Nepal with Gosainkunda — logistically more complex, but more flexible with documents.
Scheme:
-
Fly to Kathmandu, receive a Nepalese visa on arrival ($30, processing 10 minutes, requires a photo and completed immigration card)
-
Our partner processes the Chinese group visa in Kathmandu (the Chinese consulate in Nepal is more lenient, processing time 5–7 days)
-
Permits for Tibet — through the same operator, but faster: there are no strict quotas in Nepal, unlike for Russians through Beijing
Pros:
- Acclimatization through Gosainkunda (lakes at an altitude of 4380 m) — the body adapts more gently, reducing the risk of altitude sickness on Kailash by 30%
- Nepal is a backup airport: if permits are delayed, you stay in Kathmandu (visa is easily extended), rather than in Chengdu with a Chinese transit
Cons:
-
Overall cost is higher by 15–20% (additional flight, logistics through Kathmandu, Nepalese guides)
-
Roads during the rainy season (July–August) can be washed out, with a risk of delays of 1–2 days
Document Checklist (90 days before the trip):
-
Passport valid for 6+ months after return
-
Chosen itinerary (Lhasa or Nepal), paid deposit to the operator
-
Sent scan of passport + photo for permits (60 days in advance)
-
Obtained Chinese visa (30–45 days in advance)
-
Received confirmation of permits (14 days in advance)
-
Printed copies of all documents (permits, visa, insurance) — duplicates may be requested at the border
In practice, 80% of problems with documents result from haste. Tibet does not tolerate rush, start your preparation a quarter in advance, and then bureaucracy will become a simple formality, not a source of stress in the last weeks before departure.
Acclimatization: How Not to Collapse in the First 48 Hours

Acclimatization: How Not to Collapse in the First 48 Hours
Altitude sickness on Kailash is not an abstract threat from medical manuals, but a reality: every third participant in the kora feels symptoms at altitudes of 4500+ meters. I've seen strong men on their first day in Lhasa trying to "stretch" with a walk to Potala — by evening, they were lying down with migraines, nausea, and a pulse of 110. Acclimatization is not about willpower, but about physiology: the body needs time to produce red blood cells and adapt the respiratory center to thin air.
High-Altitude Adaptation Protocol (proven)
A working scheme that we have tested with 30+ groups on the Kailash Sacred Kora from Lhasa:
Days 1–2 (Lhasa, 3650 m):
Bed rest in the hotel — not a metaphor. Arrived — lie down. Maximum activity — going to the bathroom and a leisurely lunch. Drink 3–4 liters of water a day (urine should be almost clear). No alcohol, even beer: it constricts blood vessels and slows adaptation. If you want to "see the city" — look out the window.
Days 3–4:
Short walks with an altitude gain up to 4200 m — Sera or Drepung Monastery, but be sure to descend to sleep in Lhasa. The golden rule of acclimatization: climb high, sleep low. The body adapts to hypoxia during ascents but recovers at lower altitudes. Duration of the walk — no more than 3–4 hours, at a turtle's pace.Days 5–7:
Departure to Lake Namco (4718 m) or Yamdrok (4488 m) with an overnight stay. This is a stress test: if you feel fine at the lake (a slight headache is normal), you are ready for the ascent. SpO2 (oxygen saturation) is normal at 85–92% at this altitude; if the reading is 75% or lower at rest — red flag, you need to consult your guide and possibly postpone the ascent.
Red flags — when to stop:
-
Headache that does not subside with 400 mg of ibuprofen
-
Nausea, vomiting, loss of appetite lasting more than 12 hours
-
Shortness of breath at rest, cough with pink sputum (pulmonary edema)
-
SpO2 consistently below 75% — a sign of altitude edema
In 2019, a participant had to be evacuated from Namco by helicopter: she ignored a headache (“everyone else is coping”), and by morning she couldn't get up. Altitude does not forgive heroism — it’s better to stay in Lhasa for a day than to jeopardize the entire trek.
Medications and Supplements (what to bring)
Essential first aid kit:
-
Diamox (acetazolamide) — the main medication for preventing altitude sickness. Dosage: 125 mg in the morning and evening, start 1 day before the ascent. Mechanism: accelerates breathing, removes excess fluid, reduces intracranial pressure. Side effects — frequent urination and slight tingling in fingers (normal). Contraindications — allergy to sulfonamides, kidney failure.
-
Ibuprofen / paracetamol — for altitude headaches. Ibuprofen is preferable: it also reduces inflammation of blood vessels. Dosage: 400 mg every 6–8 hours.
-
Dexamethasone (4 mg ampoules) — emergency treatment for severe altitude sickness. Administered intramuscularly, it reduces brain swelling within 20–30 minutes. Bring 3 ampoules + syringes, but use only at the discretion of your guide or doctor. This is not for prevention, but for resuscitation.
-
Electrolytes (Regidron, Hydralyte) — at altitude, you lose salts through breathing and urine. Dissolve a packet in a liter of water, drink throughout the day. An alternative — a pinch of salt + lemon juice in a bottle.
Optional (start 2 weeks before):
-
Ginkgo biloba — improves microcirculation in the brain. Dosage: 120 mg/day. Effectiveness is debatable (studies are contradictory), but it’s harmless.
-
Rhodiola rosea — an adaptogen that increases resistance to hypoxia. Works cumulatively, take a course of 400 mg in the morning.
What DOES NOT help:
Oxygen canisters from the pharmacy — pure placebo. One breath raises saturation by 2–3%, the effect lasts for 2 minutes. I’ve seen tourists carrying 4 canisters on the trek — a useless burden. The only situation where oxygen is truly needed is medical evacuation, but there they use concentrators with a mask, not pharmacy "sprays."
On the route Kailash via Nepal: kora with Gosainkunda, acclimatization is gentler: trekking around the Gosainkunda lakes provides a gradual altitude gain (from 1400 to 4380 m over 5 days), allowing the body to adapt without stress. If you are afraid of heights — this is a route with a "soft entry."
Checklist 30 days before departure:
-
Bought Diamox (no prescription needed, but it’s rarely available in pharmacies — order in advance)
-
Completed a course of rhodiola / ginkgo (optional)
-
Assembled first aid kit: ibuprofen, paracetamol, dexamethasone, electrolytes
-
If you have chronic illnesses — consult a doctor, get recommendations in English
Acclimatization is 70% of the success of the trek. The rest is willpower, weather, and the blessing of Kailash. But the first 48 hours in Tibet determine whether you will complete the trek with a clear head or struggle with migraines on every ascent.
Gear for the trek: checklist for 3 days of trekking

Gear for the trek: checklist for 3 days of trekking
The kora around Kailash is not hardcore mountaineering, but it’s not a walk in the park either. 52 km through high-altitude terrain, the Drolma La pass at 5630 m, overnight stays in unheated guesthouses where temperatures drop to -10°C. I’ve seen tourists turn back on the first day due to wet boots or frozen hands. Gear doesn’t have to be expensive, but it must be tested and broken in.
Clothing and Footwear (temperature from -15°C to +20°C during the day)
A layered system is not marketing, but the physics of thermoregulation. On the trek, you pass through 4 climate zones in 6 hours: a frosty morning, a sunny ascent (you sweat), wind at the pass, and a cold descent.
Base layer: Merino thermal underwear (2 sets).
Merino wool wicks moisture and doesn’t smell after 3 days of wear. The first set — on your body, the second — a backup in your backpack. Synthetics are cheaper, but by the evening of the second day, they turn into biological weapons.
Mid layer: fleece (200–300 g/m²) + down vest.
Fleece is for active movement, the down vest is worn during breaks and in the evening. This combination is lighter than a thick jacket and more flexible in regulating warmth.
Outer layer: membrane jacket + storm pants (Gore-Tex or similar).
Protection from wind and sudden snow. On the program Kailash Sacred Kora from Lhasa, I saw a group caught in a snowstorm at Drolma La — those in rain jackets had frozen fingers within 15 minutes. The membrane breathes, while the rain jacket does not.
Footwear: trekking boots (broken in!), gaiters, spare insoles.
The main mistake of beginners is buying boots a week before departure. The result: bloody blisters after 8 km, ruining the trek. Break them in for at least a month, walk 50–70 km on rough terrain. Gaiters protect against snow and mud at the pass. Spare insoles — in case the main ones get wet.
Head and hands: balaclava, buff, gloves (2 pairs).
The first pair — fleece (for movement), the second — waterproof with insulation (for breaks). The buff is versatile: scarf, headband, dust protection. The balaclava saves you at night in a cold guesthouse.
What NOT to bring:
Cotton socks (they get wet → cold → frostbite), jeans (take a day to dry), sneakers instead of boots.
Backpack and Sleeping Bag
Backpack: 40–50 L with a porter, 60–70 L without.
On the kora via Nepal, porters carry the main load (tent, provisions), leaving you with a day’s supply of water, snacks, and a warm jacket. But even with a porter, take a backpack with a hip belt — it relieves shoulder strain on long transitions.
Sleeping bag: comfort -15°C.
In guesthouses at altitudes of 5000+ m, there is no heating, and the blankets are dusty and thin. A personal sleeping bag ensures warmth, hygiene, and psychological comfort. Down is more compact, synthetic is cheaper and works even when damp. A compression sack will save 30% of volume in your backpack.
Mat: foam or inflatable (R-value > 4).
Insulation from the cold floor. Foam is more reliable (won’t puncture), inflatable is more comfortable. R-value is a measure of thermal insulation: anything below 4 is not suitable for -10°C.
Trekking poles: essential.
They relieve knee strain on descents (especially critical after the pass — 8 km down over rocks), help maintain balance on river crossings. Telescopic poles are more convenient than folding ones — you can adjust the length to the terrain.
Electronics and Miscellaneous
Power bank: 20,000+ mAh.
Cold kills batteries. A phone at -10°C discharges three times faster than at home. A 20,000 mAh power bank will provide 4–5 full charges for a smartphone. Keep it in the inner pocket of your jacket (closer to your body), as capacity drops by 30–40% in the cold.
Headlamp + spare batteries.
Early starts (it’s still dark at 5:00 AM), evening trips to the toilet. Brightness should be at least 200 lumens, with a red light mode (to avoid blinding others).
Sunglasses (UV400) + SPF 50+ cream.
At altitude, UV radiation is 40% more intense, plus reflection from snow. Without protection, you risk corneal burns (“snow blindness”) or peeling skin.
Thermos 0.8–1 L.
Hot tea at the pass is not a luxury, but a way to warm up quickly and replenish fluids. A regular bottle will turn to ice in an hour.
First aid kit (supplement to the main one):
Blister plasters (Compeed), elastic bandage (in case of sprains), lip balm (lips crack from the wind).
Checklist before packing:
-
Broke in boots (50+ km)
-
Tested sleeping bag in the cold
-
Charged all gadgets + power bank
-
Packed spare thermal underwear in a dry bag
-
Checked trekking pole attachments
The trek lasts 3 days, but a mistake in gear can cost the entire trip. Don’t skimp on membranes and footwear; everything else can be replaced with ingenuity. And remember: the best backpack is the one you don’t feel on your back after 8 hours of walking.